How to Remove the Governor From a Gas Golf Cart

A slow golf cart can be incredibly frustrating. Here you are, moving along well with a decent game and the only thing holding you back from a sub-four-hour round are your slow turning wheels. Golf carts are governed to go anywhere from 12 to 14 miles per hour. But if you've got a few minutes, some simple mechanical know-how, and a wrench, you can double the speed of your cart and zip through your round. Here's an overview of how to remove the governor from a gas cart.
Warning
We do not condone tampering with a golf cart that belongs to a golf course. However, if you own your own gas golf cart or a friend allows you to remove the governor from their cart, have at it.
General Instructions

Here are some general instructions that will work across all main golf cart brands.
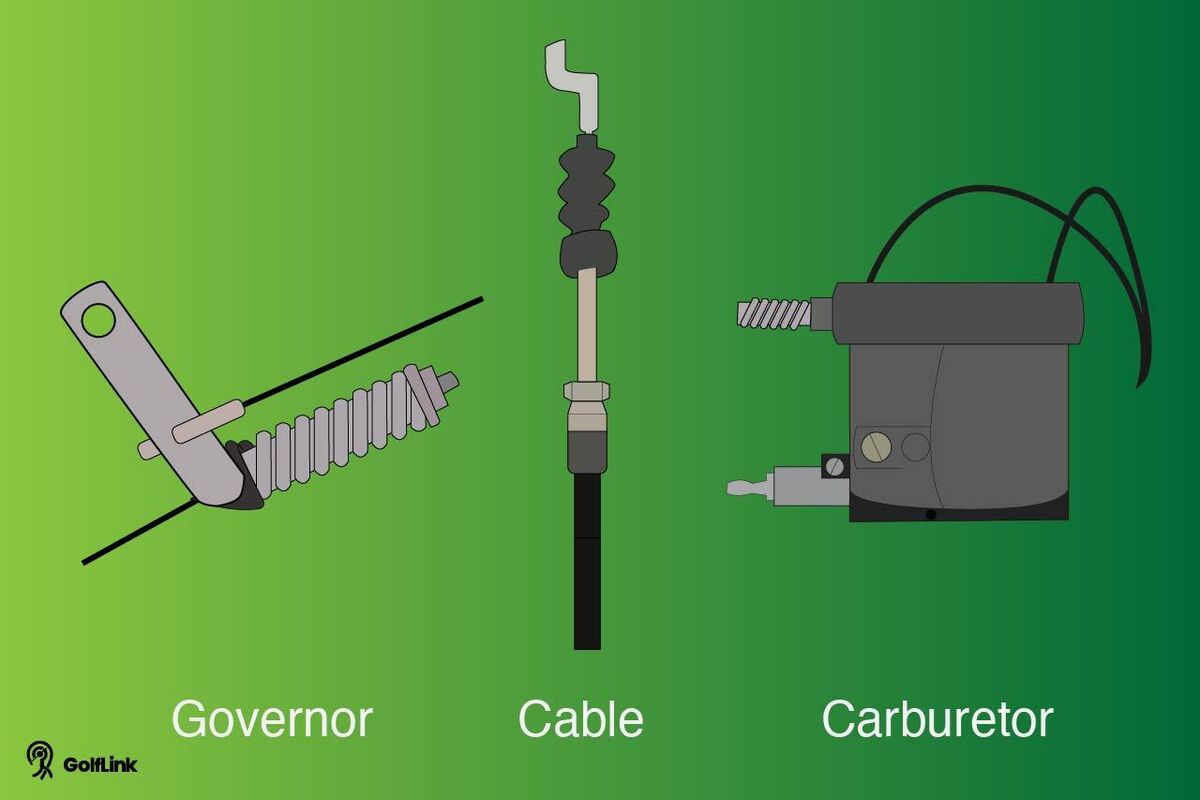
- Detach the cable from the carburetor. The cable is about the width of a straw. It should come off with a pull, but keep a phillips head and regular screwdriver on hand, just in case.
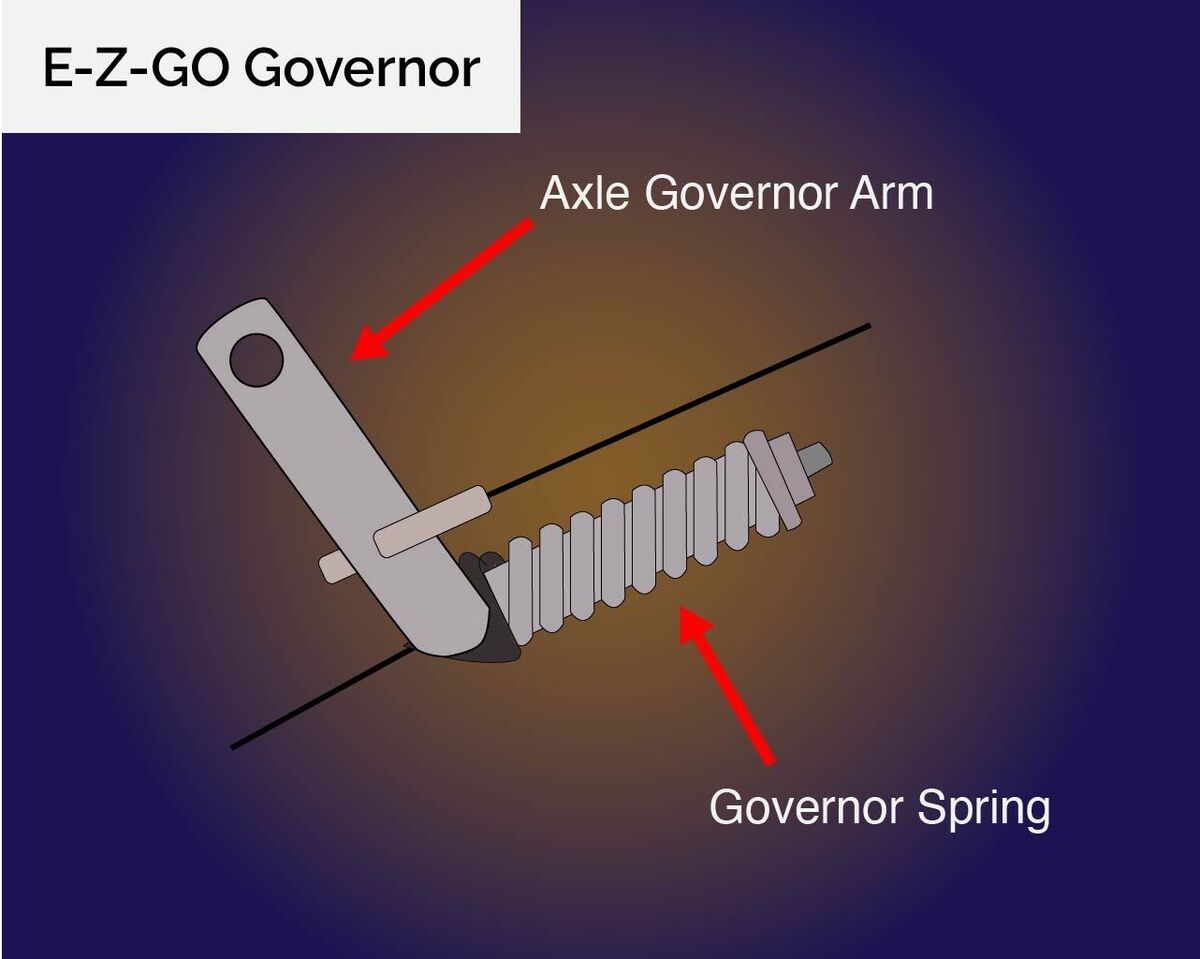
- Follow the disconnected cable up to the governor. The governor generally sits on top of the engine. This is the easiest way to find the carburetor. Once you've followed the cable up to the governor spring, disconnect it there as well. You can save this cable for later use or throw it away.
- Disconnect the gas pedal cable from the governor and reroute it to the carburetor. You've now eliminated the governor but you still need to adjust the gas pedal for optimum power.
- Using your wrench, remove the bolt on the gas pedal shaft. Slide the shaft up so there is more play in the gas pedal. Tighten the bolt and then start the cart. You may need to adjust the gas pedal shaft a couple of times before you have it to your liking.
Removing the Governor From E-Z-Go Carts

For the most part, E-Z-Go gas golf carts will follow the instructions above. However, newer E-Z-Go models make it more difficult to find the governor spring. If you run into this issue and can't find the governor spring, you may need to contact a golf cart mechanic to assist with the removal of additional panels to locate the governor spring.
How to Remove the Governor on a Yamaha Golf Cart

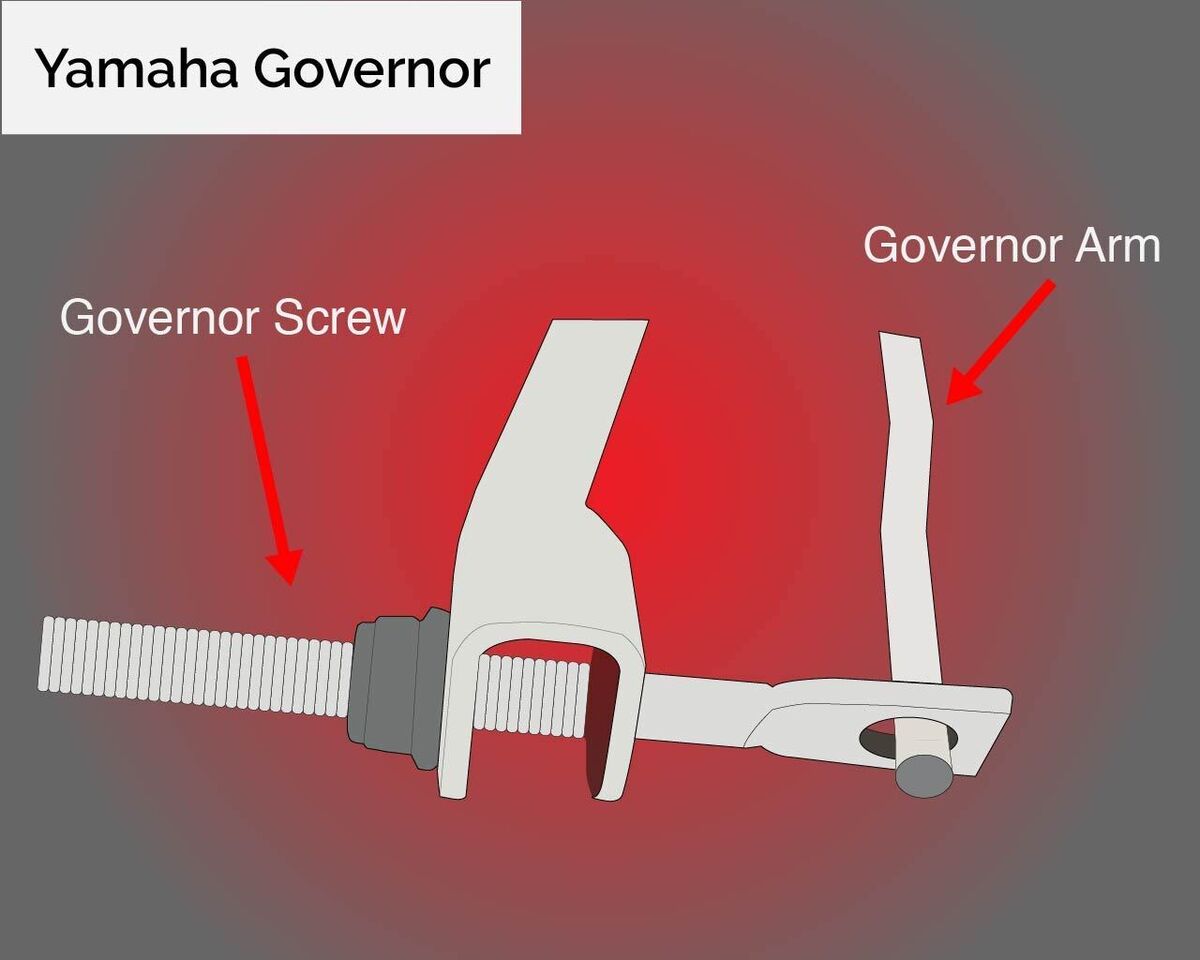
Follow steps 1-4 listed above to remove the governor on a Yamaha golf cart. The difference you will run into, depending on the Yamaha model, will be varying-sized screws and screwdrivers required to do the job.
Of all of the main golf cart manufacturers, performing this job on a Yamaha yields the smallest results. You will only gain a few MPH by removing the governor from a Yamaha.
Club Car Carts

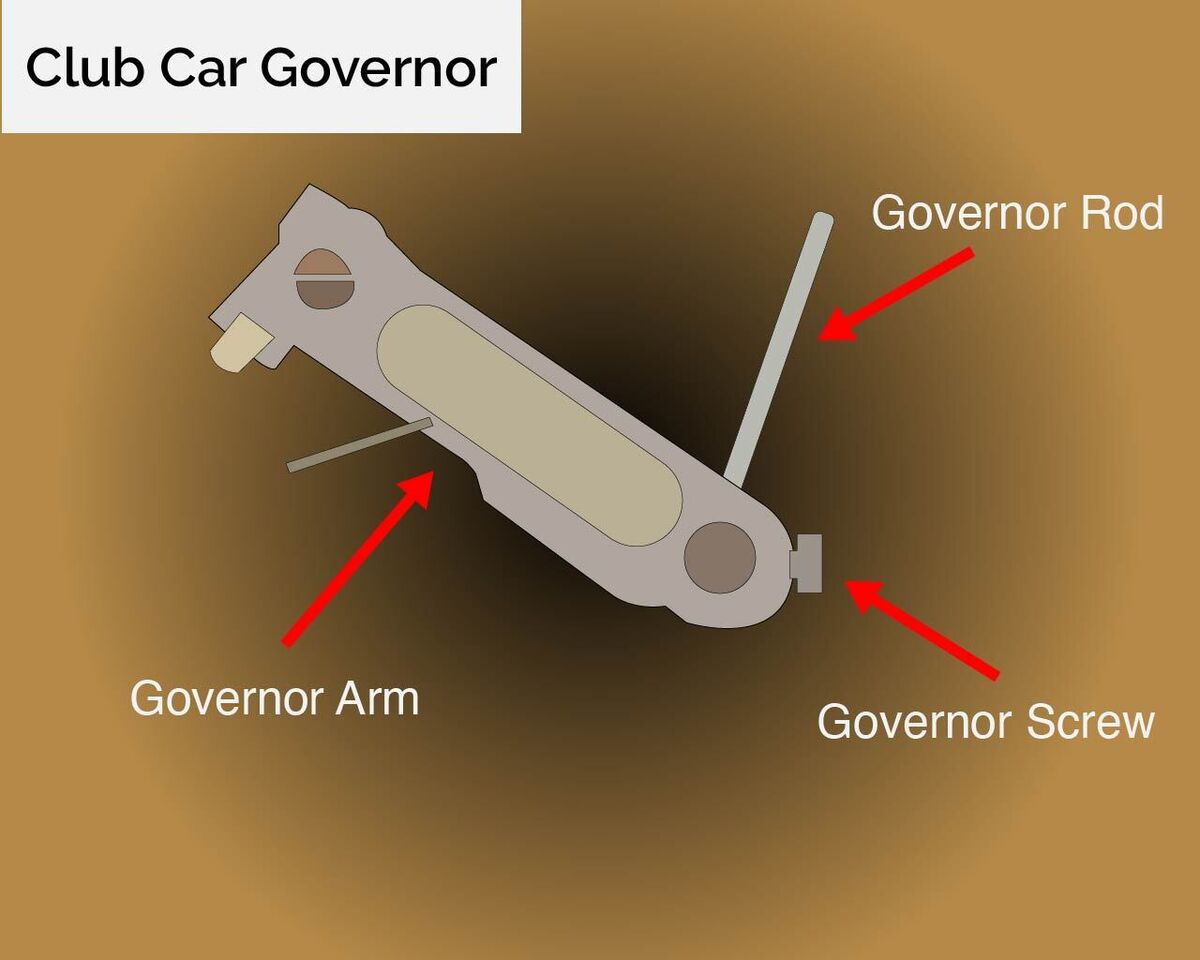
To remove the governor on a Club Car golf cart, follow the steps listed above. Club Car carts have not changed drastically over the years, so older models and newer models will follow the same steps.
It's worth noting, however, that Club Car seems to have more reports of engine failure due to attempting governor removal, so it's important to understand the risks associated with this customization.
Notes
Keep in mind that trying to remove the governor from your personal golf cart can cause engine failure which may result in having to replace it altogether. Doing so will also almost certainly void your warranty from the manufacturer, thus, costing you a lot of extra money. So you have to weigh the extra speed versus the extra (potential) cost.
It's worth noting that E-Z-Go, Yamaha and Club Car offer online manuals if you are in need of additional help.
